|
Materiais D eco_Ar MabelTube Kamil Background Imagem Kamil Wor Texto
Plug-ins Filters Unlimited VM Instant Art Three Cuts Filter Factory Gallery G: Cirquilete Plugin AAA Frames Foto Frame Cores Usadas Foreground #002075 Background #4ba0e4
Roteiro
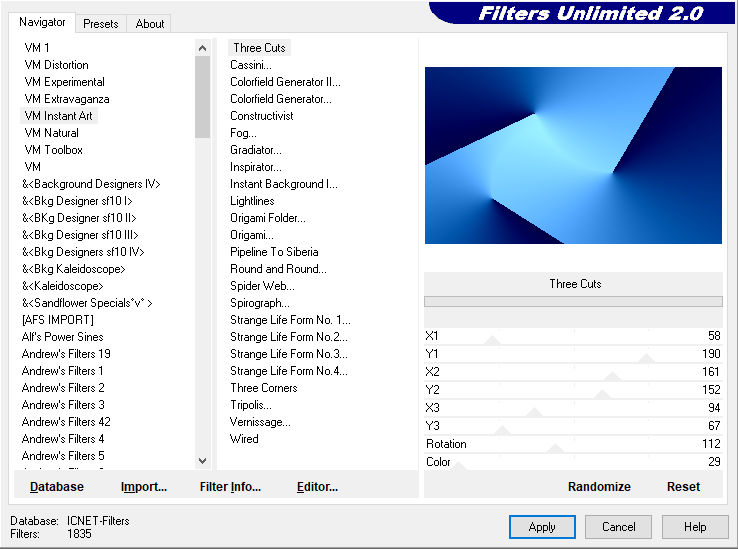
01- Abra uma imagem 1000 x 600 02 - Com qualquer cor faça um gradiente linear 0/0 03 - Aplique o Plugin Unlimited VM Instant Art Three Cuts:
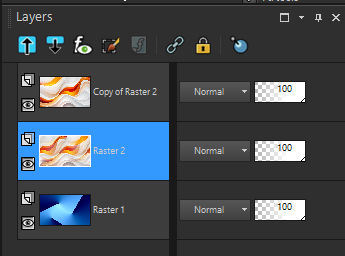
02 - Layers New Raster Layer Selections select all 03 - Edit copy no background Imagem Kamil tube 2282 BG 04 - Edit paste into selection Selections Select Nome 05 - Duplique volte para raster 2
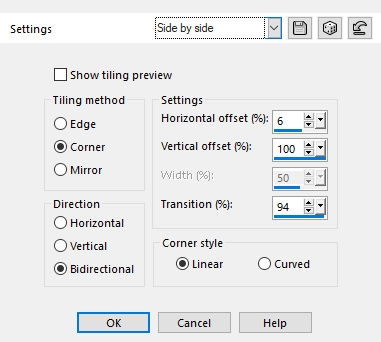
06 - Effects Image Seamlles Tiling Side by Side
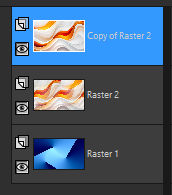
07 - Layers > Blend Mode Darken, 08 - Abra seu tube de mulher - Edit copy Volta no seu trabalho 09 - Ative a Copy of Raster 2
Layers New Mask Layer From Image encontre a Kamil tube 2282 de ok 10 - Layers > Blend Mode Overlay , na copy off raster 11 - Edit - Copy Special Copy Merged 12 - Image add border >symetric marcadoSize 2 cor escura - Foreground Size 2 cor clara - Background Size 2 cor escura - Foreground
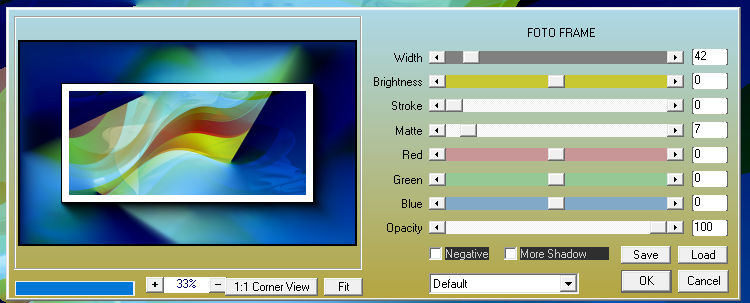
13 - Aplique o Plugin AAA Frames Foto Frame
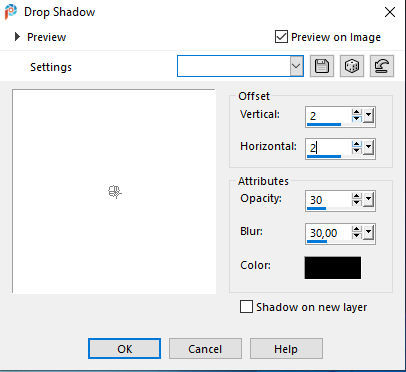
14 - Image add border >symetric marcado Size 30 cor branca 15 - Com a ferramenta Magic Wand Tool Tolerance e Feather em 0 clique nesse espaço - Selection Invert 16 - Effects 3 D Drop Shadow valores positivos e negativos (2)
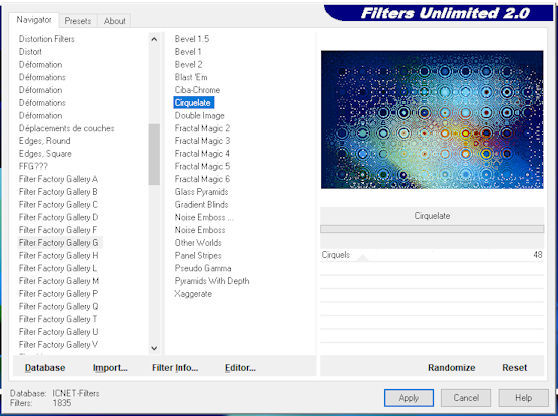
17 - Selection Invert Edit paste into selection 18 - Aplique o Plugin Unlimited 2.0 Filter Factory Gallery G: Cirquilete
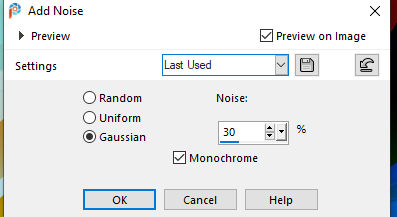
19 - Adjust Add Remove Noise Add Noise
20 - Selection Invert Effects 3 D Drop Shadow valores positivos e negativos (2)
Tire a seleção 21 - Edit Copy 22 -Image add border >symetric marcadoSize 60 cor branca 23 - Com a ferramenta Magic Wand Tool clique nesse espaço Edit paste into selection Selections select nome 24 - Image add border >symetric marcado Size 1 cor preto 25 - Edit Copy no tube principal com a Ferramenta Pic Tool X: 630 e Y:22
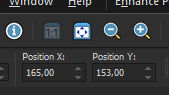
26 - Edit Copy no Deco_Ar Mabel com a Ferramenta Pic Tool X: 165 e Y:153
aqui você pode colorizar de acordo com suas cores
27 - Edit Copy no Word Mabel Posicione à sua esquerda, como esta no tuto 28-Assine 29-Salve em jpg
Tutorial criado por Aracelli Robine Bombinhas - Sta Catarina Brasil
|